It’s pumpkin time!
I like pumpkins. I like the way they look, I like them as pie, I like them in soup and I like the smell of them. I like that I can have them as sophisticated centerpieces and and then in a pagan fit of holiday madness decapitate them, scoop out their guts, roast the seedy mess, and pierce their russet skins in artful ways to create a temporary candleholder.
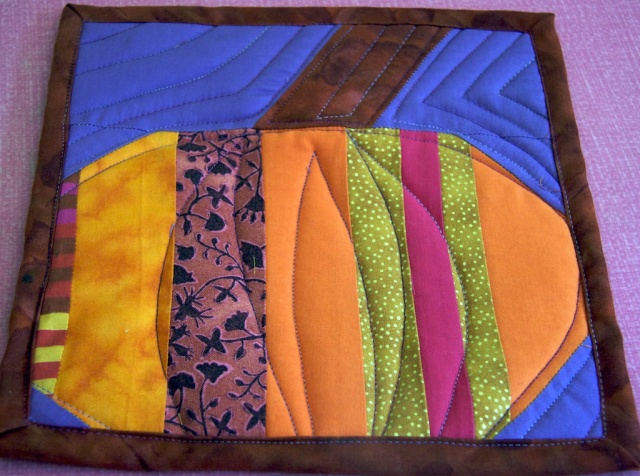
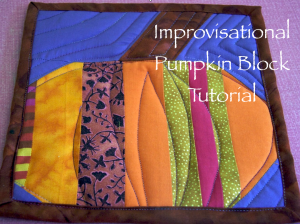
 I also like making improvisational quilt blocks. Here’s some basic instructions for making a pumpkin quilt block. Mine happens to be 9×9.

I started with a pile of orangey scrap fabric- all more than 6-1/2″ long.
I decided that no strip in the pumpkin would be wider than 2″.
 I alternated the more ‘solid’ looking strips of orange with strips of printed scrap that had larger more defined pattern on them, and strip pieced together the beginning of the pumpkin. It’s about 6-1/2″ tall by 9″ right now. Just keep piecing strips on to your liking until you’re at least at 9″ wide if you want to make a block similar to mine. This is improvisational piecing so you can do whatever you like. If you’re making a collection of pumpkins in fact, I’d say change the width and the length up a bit. Variety is good.

Meanwhile, back at this block, the raggedy ends got trimmed off. And things were squared up.
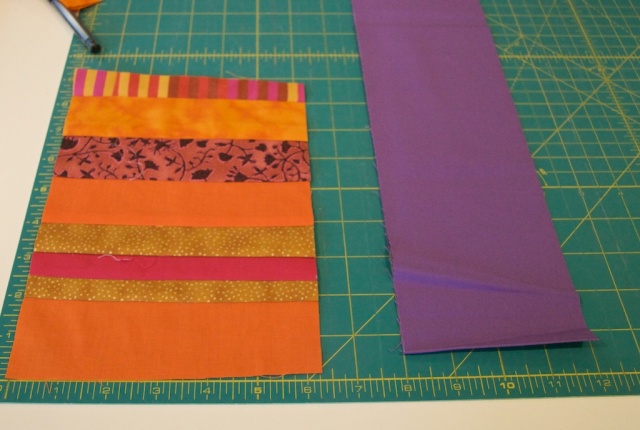
We decided purple would be a festive background. So with a 3″ square of purple cut diagonally into two triangles, I “rounded” off the corners of the pumpkin.

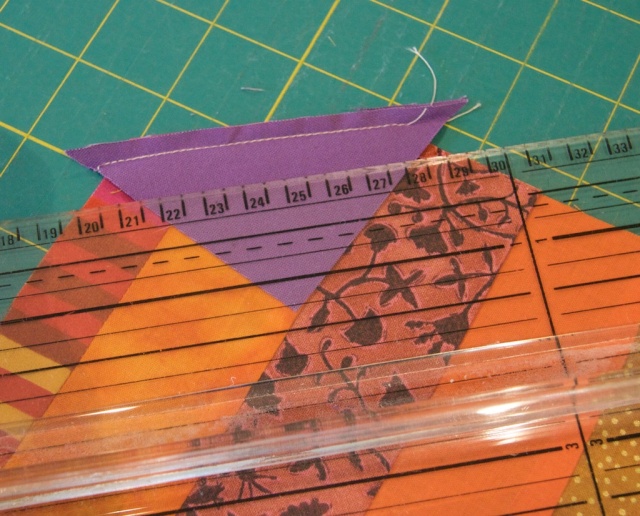
Trim off that extra pumpkin corner bit and do the other side. Square things up again.
Then, remember the purple 4″ strip? Hold that strip up against the squared up pumpkin body and make a straight cut across somewhere in the middle. I made mine slanty.
Insert an approximately 1″ wide strip* at that cut, representing the pumpkin stem, and sew the other side of the strip to the stem.
*Remember that if you make a diagonal cut as I did, you’ll need use a strip longer than 4″ long to cover the distance. (And, you could use this formula if you wanted to, or remembered it:![]() , with ‘c’ being the hypotenuse, or as I like to call it, ‘the slanty side’.) Truth be told, I held up a scrap to make sure it was long enough. Why do math when eyeballing works?
, with ‘c’ being the hypotenuse, or as I like to call it, ‘the slanty side’.) Truth be told, I held up a scrap to make sure it was long enough. Why do math when eyeballing works?

Anyhow, clean that strip with the stem up, and sew it to the pumpkin body.
Then take a look at your block. If you like your pumpkin like this, you’re done with your block. If you, like me, are feeling like maybe some more corner cutting is necessary, repeat the steps with the corner pieces just like above, but now with the bottom of your pumpkin. Either way looks good to me. I’m all about choice.

So, while you’re choosing, you can make different size pumpkins by varying the proportions of the strips to the background, make the stem shorter or taller, make the wedges at the side of the pumpkins larger or smaller.
Improvise!






Pingback: Tutorial: Improv Pumpkin block · Quilting | CraftGossip.com
Thanks for sharing this! Very cute, I’ll try it!
How cute! Thank you!
Pingback: Improv squared | Gyetramp
Pingback: 11 Colorful DIY Potholders From Different Materials
Pingback: 20 FREE Fall Projects To Quilt, Sew & Embroider - Jacquelynne Steves