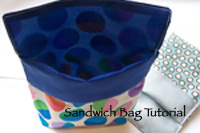
 I don’t know about you, but I have a lot little scraps and things that get generated in the process of sewing things. Little triangles of fabric that need to be clipped off. Thread tangles. Lint balls. Other things I don’t want tangled up and sewn into quilts and other projects. I also have a whole lot of little bits of fabric scraps that I cannot bear to chuck. Lots of these scraps end up in quilts, but some are home decorator weights of fabrics that I don’t want to mix into quilts. Plus there’s all those bits of pieces of batting that are left over and too small to piece onto other batting. Here’s one thing to do with those bits and pieces.
I’m assuming that anyone reading this and making one knows how to sew more than straight flat lines. There’s a little math involved too if you’re interested. If not, it’s possible to wing it. Sewing this project involves connecting a straight thing to a round thing. Sort of like sewing on a sleeve, but from my point of view, lower stress because there’s less fabric at risk, and no one waiting impatiently for a costume or prom dress. That, and it’s not due tomorrow morning.
 Ok, let’s get going shall we? I started with a bowl the approximate diameter that I wanted. Mine is about 5-1/4″ in diameter. I traced around that on a scrap of quilting weight fabric for the lining. I traced around that also on a piece of canvas for the outside.

Also, I cut two strips of fabric – one for the outside (I used a velveteen scrap) and one for the inside (I used quilting weight fabric) 3-1/2″ wide. And cut a 3-1/2″ wide strip of batting while you’re at it.
For a 5-1/4″ wide bowl you need about 16″ inches on the strips. If you want to be exact about how long the strips need to be, you’ll need to go back to junior high school geometry and use the formula Circumference= Pi times Diameter. Only since you’ll be taking a 1/4″ seam allowance, the diameter you should use is 1/2″ smaller than the actual measured diameter. (1/4″ is taken from all sides so the diameter decreases by 1/4″ times 2)
So in this example….5-1/4″ minus 1/2″ = 4.75″ (diameter) which then multiplied by Pi (3.14159) equals 14.92″ (yes, we have now converted to decimals because I used my calculator) which then should have another 3/4″ (.75″) added to it for the 3/8″ seam allowance for the join of the circle. So…14.92+.75= 15.67″ which is a whisker less than 15-3/4″. Clear as mud?
Disclosure – I didn’t do the math until I wrote this tutorial. I sewed knowing that I had enough fabric in my scrap strip and trimmed later. If you’re new or dicey about sewing straight things to round things, it might be wise to do the math though so you can pin and sew your cylinder smoothly. If you do the math, sew the 3-1/2″ strips – quilting fabric with the batting on the wrong side of the fabric; velveteen or whatever you’re using; right sides together with a 3/8″ seam and the pin the cylinders at each quarter of the circle with right sides together and sew the circular seam.
If you don’t do the math and live fabric bowl sewing on the edge like me, match the quilting fabric plus batting with the quilting round, and back tack, and sew around the 1/4″ of the circle until you’re all the way around. Back tack again. Trim the strip and sew the side seam. Join the circle if needed.
Do the same thing with the velveteen and canvas. You’ll end up with two cylindrical fabric objects.

Tuck one inside the other right sides facing each other. I purposely do not match the seams up to avoid a big thick lump on one side.
Sew around the top lip of the cylinders with a 1/2″ seam, backtacking at the beginning and end of this seam and leaving a 3″ opening to turn everything right side out again.

Turn things right side out.
Tuck the quilting fabric inside the home dec fabric bowl, and you’re on the home stretch.
Top stitch around the top edge through all the layers to close and finish off the lip of the bowl. Top stitch again around the bowl through all layers 1″ down from the top.

You can flip the top down or up depending on how deep you want to bowl to be. The bowls are reversible, but if yours are like mine, they seem to prefer to have the heavier weight fabric on the outside. Use the fabric you have. Here’s one with corduroy.


These are the cutest. I must make a little one for my thread bits from my hand stitching. A great gift idea too!
I really like this idea. Thanks for the math! I think they would be great for decorating around the house. And nothing breakable!
Yes! Unbreakable is a good thing around here!
Oh my gosh! I thought I had entered the twilight blog zone and my Dog Max was on your blog — that is until I scrolled down the page past the head-shot and the resemblance ended. Take a look at Max!
http://JudithWesterfield.wordpress.com
Can I put your Schnap’s picture on Max’s blog post?
Sure… Schnap is a total ham. She’d love to be on Max’s blog post.
Max is super cute!
So funny! I just saw your Gravatar. Max and Schnap do look alike!
Oh, thanks so much for this! Fabric bowls are so handy. I just finished one! Love the fabrics you used on yours.
Thanks!
Love these. Thank you for sharing
I found your tutorial on stumble a couple of days ago. I just finished my scrap bowl for my sewing. I just love it, thanks for sharing.
Reblogged this on All Kinds of Things Blog and commented:
I need to make some of these in a larger size for my cats. So cute!!
My partner and I stumbled over here from a different page and thought I might as well
check things out. I like what I see so now i’m following you. Look forward to looking over your web page for a second time.